Garden Guide

Sellerina
My dashboard
First steps
The dashboard shows you everything at a glance: growing areas, plants, plans, recipes and open to-dos — with your harvest converted into kilos and meals. If you are new, all numbers start at zero. They fill with life as soon as you get going.
Discover plants. Pick what should end up on your plate. Chosen plants land in “My plants” — where you adapt them to your variety and your climate. That way everything becomes exactly what you need.
My garden — right at the top of the menu — is your realm: create growing areas, name them, set their size, and create your growing plan right there. The planner does the thinking: crop rotation, growing breaks, companion planting and the right timing. But beware: a plan needs at least three sub-areas — only then can the rotation wander, and the same plant family returns only after its break. Otherwise the soil tires, and diseases linger in the ground for up to 20 years.
To-dos. Your task list is your little helper: it tells you exactly when to pre-grow, sow or plant out. Tick things off right in the garden or on the to-do page — your own lists and to-dos work there too.
So sow and plant when the time is right — and a full bowl will be in sight.
Discover plants
First steps
Pick what you want to eat — your garden will provide the treat.
Discover plants is GrowSimply's catalog — and your menu: over 150 ready-made plant templates, vegetables, herbs and spices, berries and shrubs. This is where your garden's first decision is made: What do you want to eat? One click on Select, and the plant is added to "My plants" — you stay in the catalog and keep putting your future meals together.
The catalog's most important rule: here you pick the plant species — the tomato as such. Which variety it becomes, you decide later under "My plants"; its name is on your seed packet. So: first decide what you want to eat — then which variety it should be.
The toolbar at the top of the catalog
Not searching, just browsing? Then the sort button sets the direction: from A to Z — or flipped once, from Z to A.
The toolbar at the top of the catalog
Next to it sit the group buttons: All shows the whole catalog, the carrot only vegetables, the leaf only herbs and spices, the berry only berries and shrubs. One click, and the catalog puts everything else aside — All brings it back.
The toolbar at the top of the catalog
The second row of buttons filters by properties: The hourglass shows seasonal plants, the lying eight the perennials for your permaculture bed, the giving hand everything that is easy to grow — perfect for starters — and the two hands the slightly more demanding candidates. Keep in mind: exactly one filter applies at a time. A new click replaces the old one — no combining, so no getting lost either.
The toolbar at the top of the catalog
Two views, two speeds: The card view shows every plant as a full profile — for browsing and comparing. The list view turns them into compact rows with image, name and Select button — your fast lane when you want to collect many plants at once.
The toolbar at the top of the catalog
Type into the search, and the catalog filters as you write. It knows plant species and plant families — "tomato" finds the tomato, "nightshade" the whole clan at once. And the counter below always tells you how many candidates are still in the running.
And if the search comes up empty? Then the wish-plant card appears. It first reminds you of the golden rule — search for the species, not the variety — and if the species really is missing, you send it straight to GrowSimply as a wish. With one of the next updates, it moves into the catalog.
The plant card — a profile worth browsing
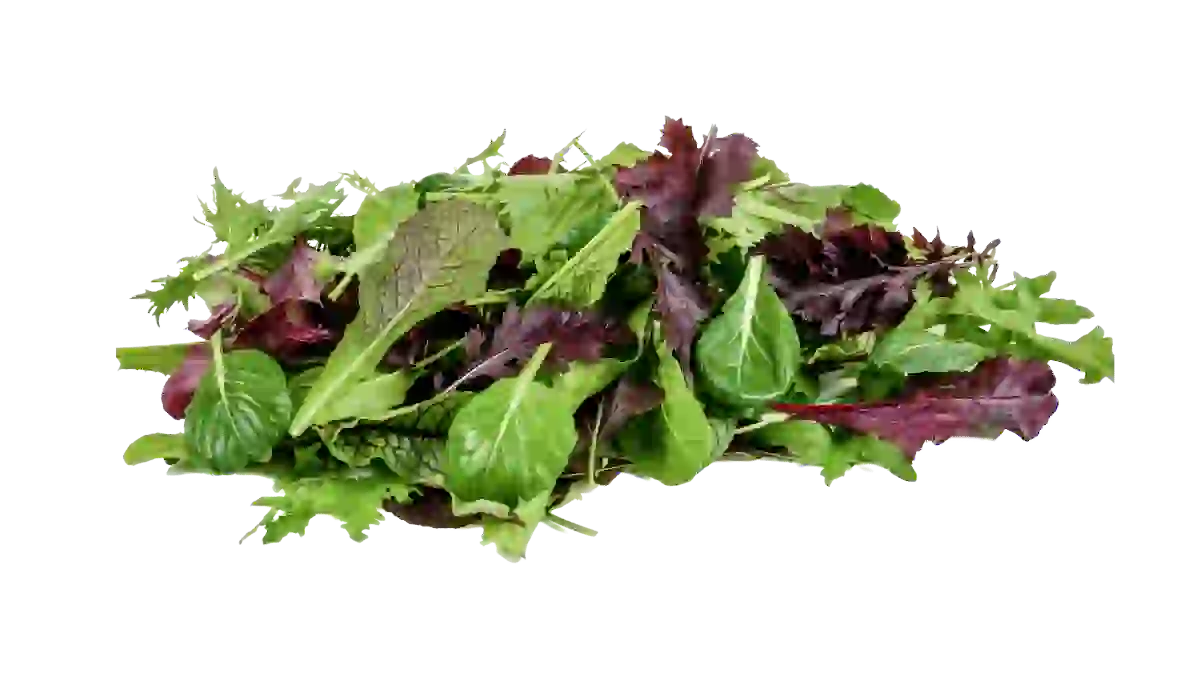 AsiasalatFrüh
 Planting break5 yearsCultivation from 6 sub-areas
 NutrientsMedium feeder
Also called:
- Brauner Senf
- Indischer Senf
- Brassica juncea
A plant card from the catalog
Every card is a small profile: image, name and plant family on top — some species appear several times in the catalog, as early, summer or late templates. Below, the essentials at a glance: how easy it is to grow, whether the plant stays for years in your permaculture bed, or how many years of planting break its family needs in the same spot. Plus nutrient needs, yield, growth height and sun demand. The month band at the bottom shows when to sow, plant and harvest, and behind "Also called" you will find the folk names — in case you know your plant by another name.
Select — what ends up on your plate
One click on Select, and your future meal is ordered — the app reports "Plant saved", and you stay right where you are: in the catalog, ready for the next course. A small counter bubble appears on the card: 1× means you have picked this template once already. And yes — you may take the same template several times, for example for two varieties of the same species. The bubble simply keeps count.
Everything you pick here waits for you under "My plants" — and from there it feeds your sowing calendar and your crop plan. First your food goes on the plan, then into the bed — and finally onto your plate.
An empty menu plans no garden — so choose now instead of waiting.
My plants
First steps
For every plant there is a book on the shelf — and what is inside is your call.
My plants is your bookshelf: For everything you picked to eat in the catalog, there is a book of its own here. The orange book button on the card opens it: the complete profile from sowing to harvest, with pictures, neighbors and tips.
And the best part: the books are yours. Every template comes preset for the Central European climate — you can simply use it as is. Or you make it your plant: name its variety, give it your photo, and adjust the values — one by one with the pencil, or comfortably with the assistant in question-and-answer style.
The toolbar at the top of My plants
You know the toolbar from the catalog — groups, properties, card and list view. Two buttons are new: The sheet of paper shows only untouched templates, the name tag only the plants you have already customized. And the search can do more here: it also finds your variety names.
The toolbar at the top of My plants
The slider button next to the search is your label printer: you choose which facts appear on the plant cards — from planting break to germination temperature to root depth. Your cards, your labels: show exactly what you pick your plants by.
The toolbar at the top of My plants
The sort field brings order to your bookshelf: by plant species, plant family, planting break or planting-out time — the arrow next to it flips the direction. At the top right waits the crown, Sort yourself: your cards become rows with a handle, you drag them by mouse or finger into your preferred order, and Save takes it over. From then on: My order.
The plant book — every card opens up
The top bar of the plant book
The orange book button opens your plant's book. At the top: the photo with a camera button — hang in your own picture —, the name, the variety and the folk names, each with a pencil next to it. The variety is called "Template" until you name it: give it the name from your seed packet, and you will recognize your plant instantly anywhere in the app. Above it all sits the top bar: Back, Help, Duplicate, Delete.
Then the journey through the book begins: the description with its large initial letter, the pictures from seedling to harvest — you may hang in your own photos here too —, the month band for sowing, planting and harvesting, plus chapters on propagation, site, spacing and yield, including a fertilizer tip. Further back wait the good and bad neighbors — each with a reason, like "keeps pests away" or "competes for space" —, the common diseases, the weather conditions with foil tunnel and greenhouse, and finally tips on planting and seed saving. And if you stumble over a technical term: the little question marks explain it on the spot.
The assistant — your plant, your climate
The assistant in the plant book
The magic wand opens the assistant: adapt the plant to your climate. It is the easiest way to tune your plant to your location and your climate: it asks you a few simple questions — you answer, it takes care of the rest. No expert knowledge, no tables, no math. Perennial permaculture plants, by the way, do not need the assistant — they simply stay where they are.
At the end the assistant shows its preview: what it will change for you — old crossed out, new next to it. Nothing is saved until you press "Apply". Until then you can leave at any time and nothing happens: the assistant is built for trying things out.
Duplicate and Delete — keeping the shelf tidy
Duplicate puts a second book of the same plant on your shelf with one click — handy when you want to grow one species as two varieties, or raise one indoors and sow one directly. The copy starts out with the same name as the original — name its variety, and your shelf keeps the two neatly apart.
Delete removes a book from the shelf for good — the app double-checks with you, because there is no way to restore it. But remember the gentle way back: if you have only twiddled too many values, do not delete — at the very bottom of the book, resetting all properties simply returns the plant to its template.
Know your plants and tend them well — that is how solid groundwork is laid.
My garden
First steps
Your garden in your hand, a mirror of your land.
The compass shows the real directions — and unlike on a map, south is at the top here: your garden faces the sun. If you ever get lost, just tap the compass and you're back in the middle of your garden.
The toolbar at the bottom left of your garden
My garden shows your property as a 3D model. You always start in view mode: drag with your finger or mouse to look around, zoom in, or switch to fullscreen — as if you were looking through a window. And once everything is set up: one click, one postcard for your community.
The toolbar at the bottom left of your garden
In edit mode you place decorations like buildings, paths, hedges and trees exactly where they belong. In the same view you also create your growing areas — and place them just as easily as any decoration. Almost like a toy box — except it's your real property.
The display — your garden, your pace
The toolbar at the bottom left of your garden
Not every device is a racehorse — and your garden should run smoothly everywhere. That's why the display button lets you switch shadows, grass, effects and weather off one by one. Effects means: finer light and color mood. Weather means: if it rains outside your window, it rains over your beds too. If the garden stutters, switch off what you don't need — it instantly runs lighter. You also pick the surroundings color here: green or light. If greens are hard on your eyes, switch to light. Your device remembers your choice.
The toolbar at the bottom left of your garden
Sometimes you just want to look. One click on fullscreen and everything else steps aside — just you and your garden, filling the screen. The same button brings you back; on devices that can't do fullscreen, it simply stays hidden.
The toolbar at the bottom left of your garden
Your garden is looking its best? Capture it: one click on the camera and your current view becomes a postcard — on your phone it opens sharing, on your computer it lands in your downloads. For your community, the fridge door, or winter daydreaming.
The toolbar at the bottom left of your garden
Weeds and grass grow just as relentlessly in your digital garden as they do outside. Luckily, garden work here won't hurt your back: you pluck weeds in passing, and the little tractor purrs across the lawn to mow. All that's left is a satisfied grin — freshly mowed just looks good, even digitally.
Shadow & sun — just like outside, only earlier
The sun bar at the top right of your garden
The shadow in your 3D garden is no decoration — it falls exactly as it falls in your real garden: same place, same time, same season. Turn the time dial at the top right and you'll see in the morning where the shade will lie in the evening — the sun wanders across your property before your eyes. The now button brings you back to the current hour.
The sun-hours map — your spot finder
The sun bar at the top right of your garden
Where should the next bed go? The map knows. One click on "Show sun hours" and your ground turns into a bright map. Tap any spot — you'll learn how many hours of sun arrive there each day, and which of your favorite plants love exactly that place.
The sun bar at the top right of your garden
And because the sun doesn't care about your garden fence: whatever stands behind it takes light away too — a hill, a forest, a mountain on the horizon. Switch the mountains on — then the sun in your garden only calls it a day when it really disappears behind the mountain.
First ask the sun, then fetch the spade — that's how a good bed is made.
The month bar — your year at a glance
The month bar at the top of your garden
Above your garden lies your whole year: one bar per month — the bar's height shows your utilization, higher means more, up to 100%. The colors inside are that month's temperatures, translated by the scale below. And now the magic: tap a month and your garden travels there — the beds show what grows then, and even the trees wear the season: in September the leaves turn. The bright frame marks the current month — tap it and you're back in the now.
Weather & climate — the foundation of it all
The weather chip at the top, on the month bar
Your garden knows your weather — the real thing, for your location, always fresh. Everything GrowSimply advises builds on it. The temperature chip at the top shows day and night at a glance; one click opens the big picture: the weather right now, the next ten days, and the year month by month — each with day and night values.
And your garden plays along with the weather: if it rains or snows outside your window, the weather drifts through your 3D property too. Too much atmosphere? Switch it off in the display settings.
Your growing areas — the action pin
The action pin above each of your areas — its three paths and the bulb
Once you've created and placed your growing areas, each one gets its own pin. It floats above the area like its doorbell: tap it and three paths open — edit the area, info about the area, and the crop planning, where you create, view, edit or delete this area's plan. If a bulb with a number lights up on the pin, exactly that many tasks are waiting for you — tick them off right at the bed instead of digging through lists.
The action pin above each of your areas — its three paths and the bulb
The gear opens your area's form — the same interface as when you created it: change name, dimensions and build type, or give your area its own picture.
The action pin above each of your areas — its three paths and the bulb
The bulb with the wave opens your area's sheet: dimensions, square meters, sections and build type, plus the top view with season zones and walkways. Below wait this month's to-dos for exactly this area — tick them off, done. And if nothing's due, the sheet tells you in the nicest way: all done — this area is taken care of.
The action pin above each of your areas — its three paths and the bulb
The calendar bulb is the door to this area's crop planning: view the plan, create a new one, edit or delete it — all right there, without leaving your garden.
Your growing plans — automatic or handmade
It's your choice: the automatic planners — crop rotation, companion planting or permaculture — do the thinking for you and build the plan by the rules of each principle. Or you plan by hand with the assistant at your side: step by step it suggests plants that fit well — and you always decide by your own ideas and experience.
And when it's done, show it with pride — a postcard from your garden, far and wide.
Growing areas
First steps
First the area, then the show — divide it well and off you go.
Growing areas are the stage of your garden: beds, raised beds, greenhouses — rectangular, round, or as L, T and U shapes. And they are born right where they belong: in the middle of your garden. In edit mode you create them and place them on your property like a deco element — except that later your food grows here.
Their heart are the sections. They make crop rotation possible: each plant family moves one field further every year, and your soil stays healthy. That is why the app stays friendly but firm here: a crop plan needs an area with at least three sections — or a single one for the perma bed planner.
How an area is born — right in your garden
The toolbar at the bottom left of your garden
The action pin above each of your areas — its three paths and the bulb
The way is the same as with deco: switch your garden to edit mode, create a new growing area and place it exactly where it stands outside. From then on it has its action pin — and behind its gear lives its form: the same interface as when creating, reachable any time.
The area form — shape, build, sections
The top view in the area form — with zones, paths and borders
The form is your area's blueprint. You give it a name and choose the shape — rectangular, round, or as L, T and U shapes for the corners and angles real gardens simply have. Then the build: flat bed, raised bed or greenhouse. And finally the sections: from an undivided area up to a large area with 24 sections.
When entering the measurements, two of the app's memory hooks help: sections are created along the width, plant rows run along the length. You also choose paths (none, between two or between all sections — including path width) and, if you like, a perma zone on the left or right: a strip that stays planted permanently while the rest rotates seasonally. The top view next to it draws everything live — season zones, perma zone, paths, section borders.
And the most important number of the form: three. Choose fewer, and the app tells you straight away — two sections are not enough for a crop plan. That is not chicanery but soil protection: only from three fields on can the rotation really wander. The app knows the exception too — a single section is enough if it is to become a perma bed.
Finally you may give your area its own photo — it then appears on its card. The app's photo tip is worth gold: photograph the area straight from the front, from the side from which you look at the sections from left to right — then the perspective later matches the display exactly.
Two protective rules watch over your work: if an area is used in a crop plan, it can only be edited in a limited way — and a group in a plan is locked entirely. So you never take a running plan apart by accident. Deleting still exists, clearly visible in red — and only after a confirmation.
Groups — small, but plannable together
If your areas are individually too small for three sections, you put them together in a group — it counts its sections jointly and becomes plannable as a whole. Every group shows its counter and its member areas; with "Add area" it grows, and per area you may switch between photo and graphic.
The list view — your toolbox
t-form flach
 Edit
Edit
An area card of the list view — the check says: plan in place
Besides the garden there is the classic list view of your areas and groups. It is your toolbox: here you sort the card order by hand (you already know the crown), and on devices without 3D it is the full-value way to everything. Every card shows the top view of its shape, the measurements — and the calendar check when the area already has a crop plan.
With that, everything is ready: your areas are one ingredient of the crop plan, your plants the other. How both become a plan is told in the chapter on crop plans — and in My garden your areas already stand in their place.
A bed well planned on solid ground — keeps your soil healthy all year round.
Crop planning
First steps
From bed and plant a plan is grown — and you can see the harvest shown.
The crop plan is the heart of GrowSimply. From your two ingredients — areas and plants — your year's schedule is made: month by month, section by section, including pre- and follow-up crops. So you plan the whole season in advance and keep the overview of your beds at all times.
And you decide how much work the plan takes off your hands: choose one of the automatic planners — they think for you — or plan entirely free yourself. The way is always the same, four steps: choose area, choose planner, choose plants, create plan.
Four steps to your plan
The four steps to your crop plan
The journey starts at your areas and groups — and the app is honest with you: non-plannable areas are shown too, with a note on what is missing for planning. Mostly it is the three-sections rule from the areas chapter; a perma bed needs a whole area or a perma zone. So you always know where you stand — instead of puzzling over empty lists.
Has it planned for you or plan yourself?
Automatic planners (algorithms)
GrowSimply
Optimized for large areas. Only keeps crop rotation from your selection of seasonal plants. Very efficient area use.
🌿 Companion planting planner
Sticks to crop rotation from your selection of seasonal plants and looks for good companion plant matches. High pest pressure? This can help!
🌳 Permanent bed planner
Combines the best partners from your selection of perennial plants.
Plan yourself (with assistant)
Without companion planting
Free planning without companion planting. Create a growing plan completely freely, with the assistant.
With companion planting
Free planning with companion planting. Create a growing plan completely freely, with the assistant.
The planner cards — each says honestly what it can do
Three automatic planners stand ready, each with its own character — the cards on the page tell you honestly what each one is good at: the GrowSimply planner as the efficiency master for large areas, the mixed-culture planner that additionally watches for good neighbors (and lets you choose whether two or three plants share a section), and the perma-bed planner for your perennial permanent residents. And whoever prefers to decide alone plans manually — with or without mixed culture, entirely free.
No fear of commitment: what "Later changes" means for each planner is written right on its card — with most of them you can swap and add plants even after creating. And in step three you choose from your own plants — this is where your well-kept bookshelf pays off.
Your plan — the whole year on one board
The plan board — one section, one year
The finished plan is a year board: one row per section, with your plants as bars across their months — pre- and follow-up crops stand one after another in the same row, so you see at a glance how your area works through the year. In mixed-culture plans, small counters show the partners sharing a section. And below the board stands your plan's profile: area and share per section, plant species and families — and the utilization for main season, off season and the year.
Care happens at the top of the plan: the edit button opens the editor — remove, add or swap plants, and the app keeps watching the crop rotation. Nothing is saved until you say so; discarding is possible any time. Deleting wears red and double-checks. And while your plan is running, its areas and groups are protected — you know that already.
t-form flach
Created:
2026
Status:
2026
A plan card of the list — the headband names the planner
In the plan list every card wears its planner as a headband — so you see at once who did the thinking here: GrowSimply planner, mixed-culture planner, perma-bed planner or self-planned. Plus the top view or your photo, created and status year, and self-sorting with the crown as everywhere.
And with that the guide's journey comes full circle: you chose what you want to eat, your plants live on the shelf, your areas stand in the garden — the plan spreads everything over the year, the calendar tells you when, the to-dos tell you what. Only one thing remains: harvest.
Let it plan or plan yourself — main thing is, your field gets tilled.
Sowing calendar
First steps
What others buy again each year, you'll always find it waiting here.
A sowing calendar is the common thread through the garden year — many garden lovers buy a new one every spring. Yours is built right into GrowSimply: always at hand, for this year and all the years to come. And it doesn't hang on just anyone's kitchen wall — it is calculated for your location and your weather.
Its core question is delightfully simple: What's up now? For every month you see what to sow, start indoors, plant out or buy — from the whole catalog down to exactly the plants in your crop plans.
The three scope buttons at the top of the calendar
At the top you choose your lens: All plants shows the whole catalog — for browsing what would even be possible right now. My plants shows only what's on your shelf. And In plans gets concrete: only the plants from your crop plans — your personal work schedule. One click, and tiles and year band recalculate instantly.
Your garden year — twelve months at a glance
Your garden year — the band above the month tiles
The band at the top shows your whole year: one bar per month — the higher, the more is going on. The colors inside are the temperatures of your location, the scale below translates them. The bright frame marks the current month. And the bright line in the middle is worth gold: your frost-free window. Below it in plain words — when the last spring frost falls on average at your place, and from when you are safe in nine out of ten years.
The weather chip on the band opens the big weather-and-climate sheet — the same as in your garden: your location, the weather now, the next ten days and the year's course.
The month tiles — your year in twelve cards
A month tile of the sowing calendar
Below the band a tile waits for every month. On top its season line — from "Winter · dormant" to "Spring awakens" —, below the task rows with counters, each in its color: direct sowing in terracotta, starting indoors in green, planting out in amber, buying in blue. The temperature strip above each tile runs from the coldest to the warmest color of the month. And if a month has nothing to do, it says so honestly: quiet.
The month view — what exactly is up?
The four action headers of the month view
One click on a tile, and the month opens its pages: every plant as a card, on top a colored header that speaks plainly — start indoors, sow directly in the bed, plant in the bed, buy young plants. With search, sorting by action, name or family and the hit counter you keep even busy months under control. Back is at the top — anytime.
The cards themselves are pure reference cards — nothing to save, nothing to break. They show you what you need before reaching for the seed packet: sowing depth, germination temperature and germination time, plus the orange planting-break row and the month grid of periods.
This closes the circle of the guide: In the catalog you chose what you want to eat, your plants live on the bookshelf, your crop plans spread them over the beds — and the sowing calendar tells you month by month what to do now.
A look inside at the right hour — and your garden year runs on full power.
To-dos
First steps
Half your list is written by the garden — the rest you write yourself, right here.
To-dos are your garden's memory: tasks in lists you can share with garden helpers and garden friends. The special part: the most important to-dos are written for you by GrowSimply — from your crop plans, with an eye on your weather. "This plant wants into the soil!" it says — and exactly when it is true.
Your own tasks join in: one-off ("paint the fence") or recurring — "lime the lawn, every year in March" you write down exactly once. And you may tick things off wherever it feels best: here in the list or right at the bed in your garden.
Your lists — create, share, fill
The toolbar of your to-do list
At the top you pick your list — each carries its owner's name, because lists here are shared property. Feel free to keep several: one for the garden, one as a shopping list — the menu item "Create to-do list" only asks for a name. And the trash can removes a list again — after the "Are you sure?", of course.
The toolbar of your to-do list
The button with the plus-person turns your list into teamwork: invite a garden helper or garden friend by e-mail — anyone with a GrowSimply account can join your list. Then you weed the tasks together: what one of you ticks off is done for everyone. Uninviting is just as easy — select the name in the participants box.
The toolbar of your to-do list
The plus writes an own task into the list. You give it a name and description, set priority High if needed — and then comes the nicest decision: one-off or recurring? Recurring to-dos tick their months and come back on their own — every year or every two. "Lime the lawn in March and October" you never write down again.
The toolbar of your to-do list
Your long-runners live behind "Edit to-dos" with the lying eight. Nothing there yet? Then the most honest empty room of the app grins at you: "Some dust back there… I'll do that later!"
The filter buttons above the to-dos
The three buttons above the cards sort your view: the month button shows only what is due in the current month. The open door shows everything open, the closed one everything done — after-work feeling at the push of a button.
The to-dos your garden writes for you
This plant wants to go into the ground!
Wasserspinat, Vorlage
In this area: gr2 · In the sub-area: 3
A to-do that GrowSimply wrote for you
Once a crop plan is running, GrowSimply writes the matching tasks by itself. Such a card is a small care sheet: "This plant wants into the soil!" — with a weather assessment ("The temperatures are right — plant it out now"), the latest date so the season still reaches the first harvest, care tips for the young plants, how many plants fit on the area — and on the right the date, area and section with a small top view, so you know exactly where to plant. Done? The green check at "To-do done?" seals the deal.
One thing you should know: to-dos are season notes, not an archive. After three months, open and done to-dos are deleted automatically — the list stays fresh, but hoarding is not on. Whatever should stay belongs into a recurring to-do.
And because tasks belong where the work is: if an area has open tasks this month, a bulb with their number lights up on its action pin in My garden — tick them off right at the bed. Nothing open, no bulb. The circle is complete: the plan writes the tasks, the weather dates them, you tick them off.
First planned, then done, then ticked away — your garden smiles the whole long day.
Help

The guide for this page is in the making. Until then, our support is happy to help.
More help Garden Guide

Your security key has been renewed. Please sign in again.
Please sign in or create an account.